
Learning how to make hand dipped candles connects you to one of the oldest crafts in human history — and the finished candles are some of the most beautiful things you will ever create with your own hands.
Before moulds, before containers, before any of the candle making equipment we take for granted today, there were hand dipped candles. Makers would dip wicks repeatedly into melted wax, building layer after layer until the candle grew into a tall, tapered form. It is a meditative, rhythmic process — dip, hang, cool, dip again — and the result is something genuinely special. Those long elegant taper candles with their slight irregularities and handmade character are exactly what makes them so sought after in the era of perfectly mass-produced everything.
Whether you want to make classic paraffin tapers, hand dipped beeswax candles with their warm honey scent and natural golden colour, or pure soy alternatives, this guide walks you through every single step. Let’s get started.
Affiliate Disclosure: This article contains affiliate links which means we may earn a commission at no extra cost to you. You can check our affiliate disclosure page here.
What You Need to Make Hand Dipped Candles
Full Supply List for Dipped Candle Making
One of the best things about dipped candle making is how short and affordable the supply list actually is. You need very few things — but what you do need, you need to get right.
Wax — you have three main options for hand dipped candles, and each gives a different result:
- Paraffin wax (high melt point, 140–145°F) — the most traditional choice. Gives a smooth, hard, slightly glossy finish and is very easy to work with. The firmness of high melt point paraffin is important — soft wax will sag or bend as the candle builds up layers.
- Beeswax — the most beautiful natural option. Hand dipped beeswax candles have a gorgeous warm golden colour, a subtle natural honey scent, and a slightly textured finish that looks extraordinarily handmade. Beeswax is harder and has a higher melt point than paraffin, which actually makes it excellent for dipping.
- Soy wax — technically possible but more challenging for hand dipping because soy is softer than paraffin or beeswax. If you want hand dipped soy candles, use a blend of soy and a harder wax (at least 20% paraffin or carnauba wax) to give the candles enough rigidity to hold their shape as they build up.
Wicks — square-braided cotton wicks work best for taper candles. Flat-braided wicks can cause curling. For standard taper thickness, a wick size suitable for a 1–2cm diameter candle is correct.
Wick length — each piece of wick makes two candles. Cut lengths of around 50–60cm — this gives you two 20–25cm tapers with enough wick at the top to hold and dip, and a loop at the centre to hang them over a dowel or hook between dips.
A tall, narrow dipping container — this is the most important piece of equipment for hand dipped candles. Your container needs to be at least as tall as the finished candle length you want, and narrow enough to not require a huge amount of wax to fill. A tall, thin metal can, a purpose-made dipping can, or a length of PVC pipe sealed at the bottom are all commonly used. The container needs to be heat-safe and stable.
A double boiler or large pot — to melt and maintain the wax in your dipping container at a consistent temperature. A wide pot filled with water, with your dipping container sitting inside it (bain-marie style) is the most effective setup.
A digital thermometer — maintaining wax temperature consistently is critical for successful hand dipping.
A dowel rod, hook, or drying rack — somewhere to hang your candles between each dip to cool. A wooden dowel balanced between two chairs, a coat hanger hung from a cabinet door, or a purpose-made drying rack all work perfectly.
Candle dye blocks — optional, but coloured hand dipped candles are stunning, especially in deep jewel tones.
Wax additives — a small amount of stearin (10% of total wax weight) added to paraffin wax improves opacity and hardness, helping the candles build up layers more cleanly.
How to Make Hand Dipped Candles: Step-by-Step
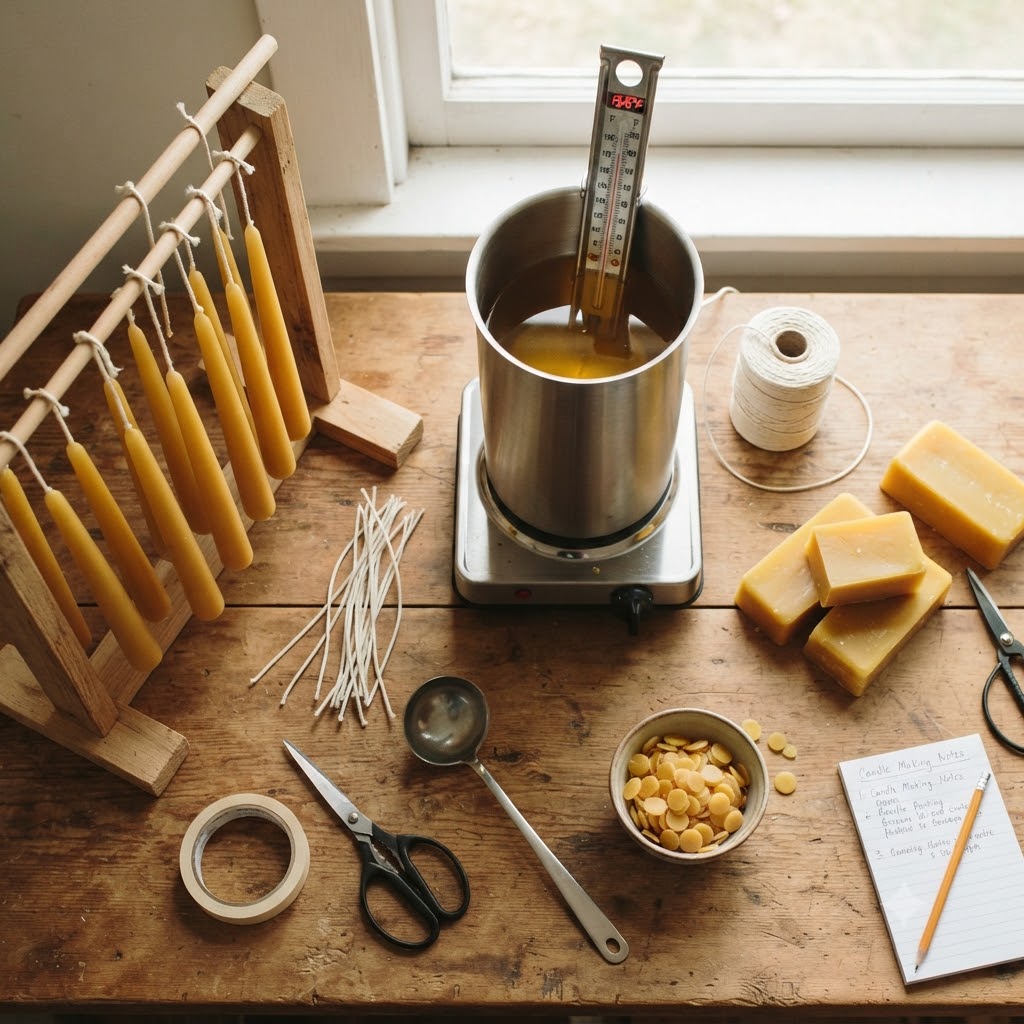
Step 1: Set Up Your Dipping Station
Setting up your workspace properly before you begin makes the entire process significantly smoother — and in hand dipping, your station needs to be specifically configured because the process is continuous and repetitive.
Set up your dipping container in a bain-marie — your tall container sitting in a wide pot of simmering water on the stove. This keeps your wax at a stable temperature throughout the entire dipping session without any hot spots.
Position your hanging apparatus directly next to your heat source — you will be moving constantly between dipping and hanging, so having them close together reduces the time the candle spends travelling between the two, which means less dripping and better layer build-up.
Lay newspaper or a silicone mat on the floor or table beneath your hanging area. Wax will drip, and protecting your surfaces now saves cleaning time later.
Step 2: Melt Your Wax and Prepare Your Wicks
Fill your dipping container with your wax and heat it slowly via the bain-marie until fully melted. The target temperature for dipping depends on your wax type:
- Paraffin (high melt point): maintain at 160–170°F (71–77°C) for dipping
- Beeswax: maintain at 160–165°F (71–74°C) — beeswax has a narrower ideal dipping range, so watch your thermometer carefully
- Soy blend: maintain at 155–165°F (68–74°C)
If you are adding colour, add your dye to the melted wax now and stir thoroughly until completely even. A paper dip test will show you the set colour.
While the wax heats, prepare your wicks. Cut each piece to your desired length (remember — one piece makes two candles). Dip each wick into the melted wax once and remove immediately. Hold it taut with your fingers as it cools — just 15–20 seconds — until the wick stiffens. This priming step straightens the wick and prepares it to build up layers evenly.
Step 3: Begin Dipping — The Rhythm of Hand Dipped Candles
This is the heart of the process. The technique is simple: dip, hang, wait, repeat.
The dipping motion: Hold your wick by the centre (or loop it over your finger) so both ends hang down, each one forming one candle. Lower them smoothly into the wax — do not plunge, do not rush. Submerge for 3–5 seconds, then lift out in one smooth, steady motion. Speed matters here — lifting too quickly pulls the soft new layer off the previous one. Lifting too slowly causes the new layer to melt back into the wax.
Between each dip: Hang your wick over your dowel or rack and allow it to cool for 30–60 seconds — long enough for the new wax layer to become firm and opaque before the next dip. If you dip again while the previous layer is still soft and warm, the new hot wax will melt it rather than build on top of it. Patience here is what creates beautifully thick, even candles.
The build: Each dip adds approximately 0.5–1mm of wax. A finished taper candle of good thickness typically takes 20–40 dips. Do not try to rush this by dipping more slowly or leaving the candle submerged longer — this just melts back the previous layers. Multiple quick dips with proper cooling between each one always wins over fewer longer dips.
Step 4: Keep Dipping — Building Your Taper Shape
As you continue dipping, you will see your candles growing gradually thicker with each pass. After about 10 dips you will have a visible, if slim, candle shape. After 25–30 you will have something substantial and genuinely beautiful.
A few things to manage as you go:
Managing drips: After lifting from the wax, hold the candle still for a moment and let any drips fall cleanly before hanging. If a drip runs down the side and sets as a bump, you can smooth it gently with your warm finger between dips.
The base: The bottom of each candle will naturally develop a teardrop-shaped drip point — this is completely normal and part of the handmade character of dipped candles. Some makers prefer to trim this off with a knife once finished for a clean flat base. Others leave it as a mark of the handmade process.
Keeping wax temperature consistent: Check your thermometer regularly. If the wax gets too hot (above 170°F for paraffin), layers will melt back rather than build. If it drops too cool (below 150°F), the wax will clump rather than coat smoothly. Adjust your bain-marie heat as needed throughout the session.
Step 5: The Final Dips and Shaping
When your candles have reached your desired thickness, you have a couple of options for the final few dips that will affect the finished look.
For a smooth finish: Lower your wax temperature slightly for the last 2–3 dips — around 150–155°F for paraffin. Cooler wax sets faster and creates a smoother outer surface.
For a rustic, textured finish: Keep the temperature the same throughout. Natural slight variations in each dip layer are what give handmade taper candles their beautiful organic character.
For a tapered shape: In the final 3–5 dips, only submerge the lower two-thirds of the candle rather than the full length. This builds up slightly more wax at the base and creates a gentle taper toward the top — the classic elegant shape of a traditional candle.
Once you are satisfied with the thickness and shape, hang the candles for a final cooling of at least 20–30 minutes before handling further.
Step 6: Finishing and Trimming
Once fully cooled, your homemade taper candles need a few final touches before they are ready to display or gift.
Trimming the base: If your candle has a drip point at the bottom, cut it flat with a sharp knife while the wax is still slightly warm from ambient heat — this gives a cleaner cut. The base needs to be flat enough to fit securely into a candlestick holder.
Trimming the wick: At the top, trim the wick to 5–6mm above the wax. At the base (if both ends of one wick piece produced two candles joined at the top), cut the loop apart with scissors to separate the pair.
Straightening: If either candle has developed a very slight curve during cooling (common, especially with beeswax), you can gently roll it on a smooth flat surface while it is slightly warm to straighten. Do this slowly and with very light pressure.
Final smoothing: Run a warm hand lightly along the surface of each candle to smooth any minor surface imperfections. The warmth of your palm is often all you need.
Your candles are now finished, beautiful, and ready to use.
How to Make Hand Dipped Beeswax Candles
Why Beeswax Is the Ultimate Dipping Wax
How to make hand dipped beeswax candles is a question worth addressing separately because beeswax behaves differently enough from paraffin that it deserves its own attention — and the results are so beautiful that it is absolutely worth understanding.
Beeswax has a naturally higher melt point than paraffin and sets to a harder, denser finish. This means each dip layer firms up faster, which slightly speeds up the dipping process compared to paraffin. The natural golden colour deepens beautifully with each layer, and the subtle honey scent becomes more noticeable as the candle warms when lit.
Specific tips for beeswax dipping:
- Keep temperature strictly between 155–165°F — beeswax has a narrower sweet spot than paraffin. Too hot and the candle will be too soft and sticky between dips; too cool and the wax will clump rather than coat.
- Beeswax naturally blooms over time — a white, slightly dusty coating develops on the surface. This is completely natural and a sign of pure beeswax. It can be buffed off gently with a soft cloth or left as a beautiful marker of the natural material.
- Because beeswax is more expensive than paraffin, minimise waste by keeping your dipping container narrow and only melting as much as you actually need for the session.
- Hand dipped beeswax candles burn longer and more cleanly than paraffin candles of the same size — a genuine selling point if you are making these for your candle business.
Displaying and Styling Your Hand Dipped Taper Candles
Beautiful Ways to Use Handmade Taper Candles in Home Décor
Handmade taper candles are one of the most versatile pieces of home décor you can make — they work in virtually any setting, any season, and any aesthetic. Here are the most beautiful ways to display them.
The Classic Dinner Table: A pair of matching hand dipped tapers in simple brass or iron candlestick holders is one of the most enduring and beautiful table settings imaginable. For everyday dining, leave them natural beeswax. For special occasions, add colour — deep burgundy, forest green, midnight navy.
The Rustic Mantel: A row of varying-height taper candles in mismatched vintage holders along a mantel is a signature rustic décor moment that photographs beautifully and costs very little to create. Mix natural beeswax with one or two coloured candles for visual interest.
The Seasonal Centrepiece: Taper candles in seasonal colours tucked into a wreath, surrounded by seasonal botanicals, or placed in a carved pumpkin make an instantly recognisable seasonal display. Hand dipped candles in deep autumn tones (rust, ochre, forest green) or winter whites and golds are particularly striking.
As Gifts: A pair of hand dipped tapers tied with a natural twine bow, with a matchbox and a small care card tucked in, is one of the most thoughtful, impressive-looking handmade gifts you can give. The packaging looks effortless and intentional — the kind of gift that makes people say “you made this?”
Troubleshooting Common Hand Dipping Problems
The wax is clumping rather than coating smoothly — your wax is too cool. Raise the temperature slightly and stir gently to bring it back to an even heat throughout.
Layers are melting back rather than building up — either your wax is too hot, or you are not waiting long enough between dips. Check your temperature and extend your cooling time to 60 seconds between dips.
The candle is lumpy or uneven — you are dipping at an angle rather than straight down and straight up. Keep the candle perfectly vertical throughout each dip. Use a slow, smooth motion and do not let the candle touch the sides of the dipping container.
The candle is bending or drooping — your wax is too soft (temperature too high or wax type too soft). Use a higher melt point wax or lower your temperature. If using soy, add more paraffin or beeswax to the blend.
The finished candles are too thin — you did not do enough dips. Paraffin and beeswax hand dipped candles need 25–40 dips minimum for a good usable thickness. Be patient — the final result is worth every dip.
The candles are difficult to separate from each other — if you dipped a pair joined at the wick loop and they are sticking together, you are hanging them too close and the candles are touching during cooling. Hang them with enough separation that they hang freely without contact.
Now you know exactly how to make hand dipped candles from your very first wick prime to your final trim — whether you choose paraffin, beeswax, or a soy blend, and whether your goal is everyday home décor or a beautiful handmade taper candles product for your business.
The hand dipping method is slow by modern standards, but that slowness is entirely the point. Each dip is intentional. Each layer builds on the last. The finished candle holds every single pass you made — a physical record of your patience and your craft. That is what gives dipped candles their soul, their character, and their beauty. It is what makes someone pick up a hand dipped taper candle and immediately feel that it is different from anything mass produced.
Start with paraffin to learn the technique, then try beeswax when you are ready for something truly extraordinary. Make one pair, then ten, then a hundred. You are now making candles the way people have made them for centuries — and they have never gone out of style for a reason.
Related: